

Made To Measure Wardrobe Guide
There’s something incredibly satisfying about creating a wardrobe that fits your space perfectly, especially when you’ve designed and built it yourself.
A made-to-measure wardrobe isn’t just a smart way to maximise storage, it’s a chance to tailor your space to suit your lifestyle, tastes, and the exact dimensions of your room.
Whether you’re working with a quirky alcove, a room with sloping ceilings, or want something that looks built-in and seamless, building a made-to-measure wardrobe is surprisingly doable with some planning and the right approach.
Let’s walk through everything you need to know, from initial planning to installing the final door handle.
Start With A Solid Plan
Before picking up a single tool, spend some time planning. Think about what you want your wardrobe to do for you. Do you need space for long dresses, lots of shoes, or hidden drawers for accessories?
A good design always starts with a clear idea of how it’ll be used daily.
Then, grab a tape measure and get to know your space. Measure the width, height and depth of the area where your wardrobe will go. Don’t just measure once; check the height at both ends and across the middle.
Walls and floors aren’t always as straight as they look, and a few millimetres can make a big difference when fitting panels and doors.
Sketch out a simple design on paper; nothing fancy is required. Just enough to visualise where the doors, shelves and hanging rails will go.
Note any features affecting your build if you work in a particularly awkward space (e.g., under a sloped ceiling or around a chimney breast).

Choose Your Materials and Tools
Once your design is in place, it’s time to consider what your wardrobe will be made of. MDF is popular for DIY wardrobes because it’s smooth, easy to paint, and cost-effective.
If you’re looking for something sturdier, consider plywood or even laminated boards, especially after a wood-look finish without the hassle of painting.
You’ll also need a few basic tools to get the job done. At minimum, that includes a tape measure, spirit level, electric drill, screwdriver, a saw (circular or jigsaw works well), and a pencil for marking out your cuts and positions.
Bring brushes or rollers, filler for smoothing joints, and sanding equipment if you plan to paint your wardrobe.
Build The Wardrobe Frame
Now comes the exciting part: building the actual structure, building your own wardrobe!Based on your design, start by cutting the panels for your wardrobe’s sides, top, bottom, and back. If you’re using MDF or similar sheet material, many DIY stores will cut it to size, saving you a lot of hassle.
Assemble the main frame by fixing the sides to the base and attaching the top and back. Use screws and wood glue for a solid build. Make sure everything is level and square, and take your time with this part. If your structure isn’t straight, you’ll struggle to align the doors later.
Once the mainframe is built, lift it into position. If it’s a complete wall-to-wall design, it may need to be constructed inside the space rather than elsewhere. Use your spirit level again to ensure the frame sits evenly, then secure it to the wall.
This step is vital for tall wardrobes, as you don’t want them to tip or shift over time.
Fit The Interior Storage
With the outer shell in place, it’s time to work on the inside. This is where your earlier planning pays off. Whether you’re building open shelves, fitting drawers, or installing hanging rails, ensure everything matches your initial measurements.
If you’re creating separate compartments, start with the vertical dividers. Then add shelves, leaving enough space between them for folded clothes, boxes, or whatever you’re storing.
If you’re including drawers, follow the kit instructions carefully; these usually come with runners or rails that must be perfectly aligned.
Remember your hanging space. A general rule of thumb is to allow around 1 metre of height for short hanging items like shirts and skirts, and about 1.8 metres for long dresses or coats.
Hanging rails are easy to install with brackets, but ensure they’re fixed securely; once complete, they’ll hold a fair bit of weight.
Install The Doors
Now let’s talk doors, arguably the most visible part of the wardrobe, and a big part of its final look. You have two main options here: hinged or sliding.
If you have plenty of space in front of the wardrobe, hinged doors offer full access to the interior and are easier to install. Attach the hinges to your door panels, then fix them to the carcass, checking their level.
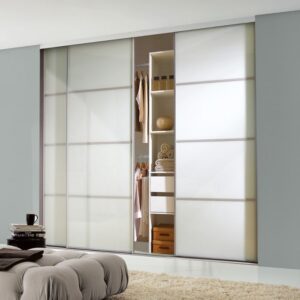
If space is tight, sliding doors are a brilliant alternative. They have a more modern finish and work well in bedrooms with limited floor space. Installing sliding doors usually involves fixing a top and bottom track, then hanging the doors on rollers.
Kits are widely available, and many are designed for DIY use, making installation much easier than it used to be.
Whether hinged or sliding, take your time getting the doors properly aligned. Poorly fitted doors can stick, sag, or look a bit wonky, and nobody wants that after all your hard work.
Finish With The Details
Once your wardrobe is built and the doors work nicely, it’s time to add the finishing touches. If you’ve used raw MDF or wood, now’s your chance to paint it in a colour that matches your decor.
Go with a classic white or off-white for a clean, timeless look, or get creative with bold tones or a wood stain.
Depending on your door style, add handles, knobs, or push-to-open mechanisms. These small details can make a big difference to the overall feel of your wardrobe, both visually and in terms of everyday use.
Give everything a final check: do the doors open smoothly? Are all the shelves level? Is anything loose? Taking a few minutes to tidy up the little things ensures a wardrobe that’s not just functional, but one you’ll love using every day.
Sliding Robes Direct Are Your Made To Measure Wardrobe Specialists!
Building your made-to-measure wardrobe might feel like a big project, but it’s one of the most rewarding DIY jobs you can do in your home. You end up with a storage solution that’s perfectly fitted, designed around your needs, and usually much more cost-effective than hiring someone to do it for you.
Whether you’re going for a simple open unit or a full-height, built-in wardrobe with sliding doors and internal lighting, the process is more accessible than you might think, and the results can be awe-inspiring.
So, if you’ve been staring at that empty wall or awkward corner, wondering how to use the space better, this might just be your sign to go for it. Contact our team at Sliding Robes Direct today!